3.1. Configuration of the Components
This chapter assumes you already installed at least one Lobby, one Gatekeeper and one Broker. If you did not do this yet, please get back to chapter Overview of the Components and follow the instructions carefully.
3.1.1. Gatekeeper Configuration
Once you installed your Gatekeeper via the nextronInstaller you can start to configure it.
To do this, we have to connect the Gatekeeper to our ASGARD Management Center.
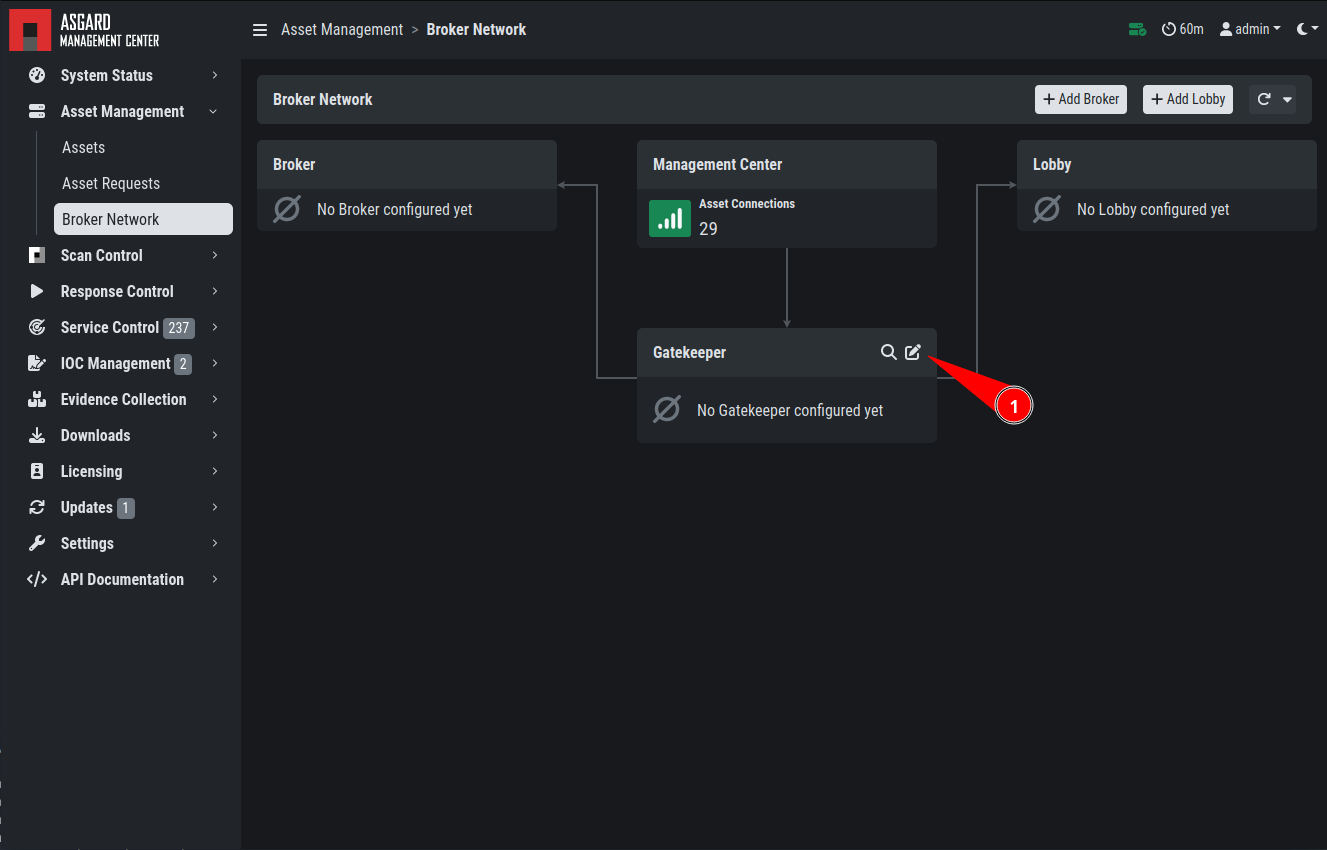
Navigate to Asset Management > Broker Network in your ASGARD Management Center.
From here you can click the edit button on the Gatekeeper:
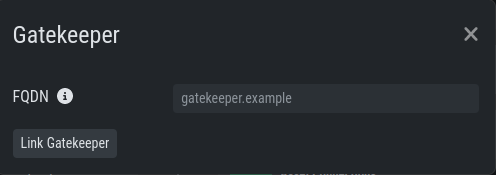
Once you clicked on the Edit Button, a pop-up will appear. Please set the FQDN of your gatekeeper.
After you confirmed your Gatekeeper's FQDN, you will get another pop-up with a
command (sudo asgard2-gatekeeper-install '<TOKEN>'). Please copy this
command and execute it on the gatekeeper via SSH:


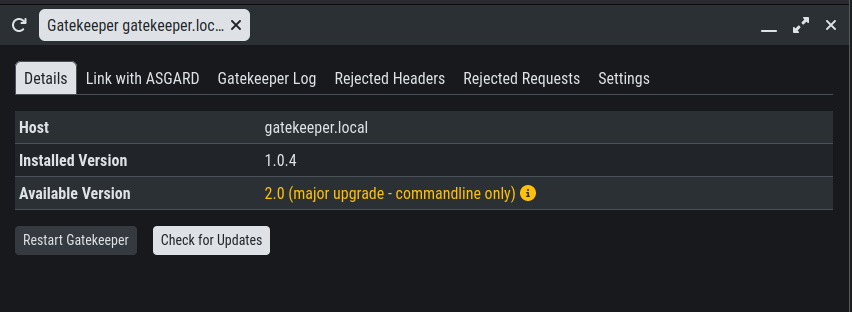
Once you are done, you can check the status and other settings of the Gatekeeper in your ASGARD (magnifying glass icon):
To see if the Gatekeeper is running correctly, you can run the following command (status should be active (running)):
nextron@broker:~$ systemctl status asgard2-gatekeeper.service
● asgard2-gatekeeper.service - ASGARD 2 Gatekeeper
  Loaded: loaded (/lib/systemd/system/asgard2-gatekeeper.service; enabled; vendor preset: enabled)
  Active: active (running) since Fri 2022-11-04 08:40:15 CET; 17s ago
Main PID: 1826 (bash)
   Tasks: 7 (limit: 4667)
  Memory: 13.3M
  CGroup: /system.slice/asgard2-gatekeeper.service
          ├─1826 /bin/bash /etc/asgard2-gatekeeper/run_asgard2_gatekeeper.sh
          └─1827 /usr/bin/asgard2-gatekeeper
Note
You might need to restart the Gatekeeper after the initial setup. To do this,
run sudo systemctl restart asgard2-gatekeeper.service on the CLI of your Gatekeeper.
3.1.2. Lobby Configuration
Once you installed your Lobby via the nextronInstaller you can start to configure it.
To do this, we have to connect the Lobby to our ASGARD Management Center.
Navigate to Asset Management > Broker Network in your ASGARD Management Center.
You can now add a new Lobby on the top right corner. Please fill in the
FQDN and click Submit. You can assign a Group to group the
Lobby and one or multiple Brokers into one group. If you are planning to only
use one Lobby you can leave the value as default.

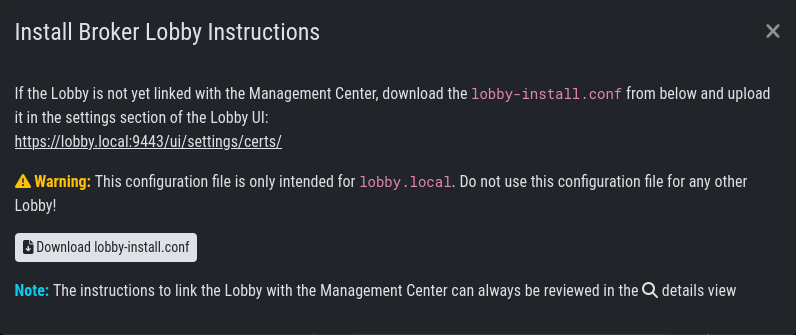
A pop-up will appear with configuration instructions. Download the configuration file, we will use this now in our Lobby.
In your Lobby, navigate to System Settings > Lobby. Here you can
upload the configuration file we downloaded in the last step:
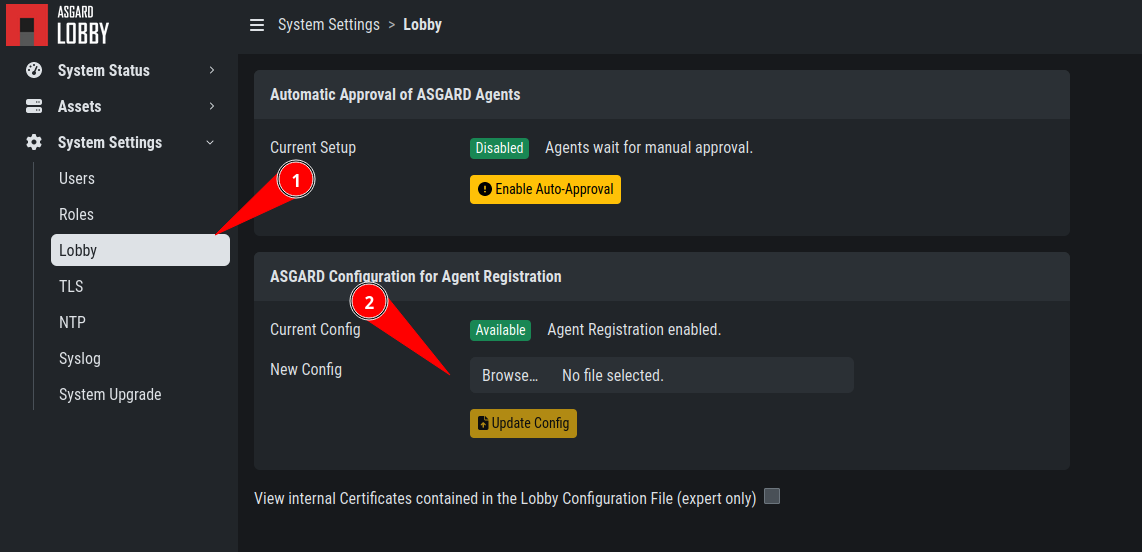
After you uploaded the configuration to your Lobby, you should now see that the Lobby is connected with your ASGARD Management Center (Broker Network view in your ASGARD):

Note
You might need to restart the Lobby after the initial setup. To do this,
run sudo systemctl restart asgard-lobby.service on the CLI of your Lobby.
3.1.3. Broker Configuration
Once you installed your Broker via the nextronInstaller you can start to configure it.
To do this, we have to connect the Broker to our ASGARD Management Center.
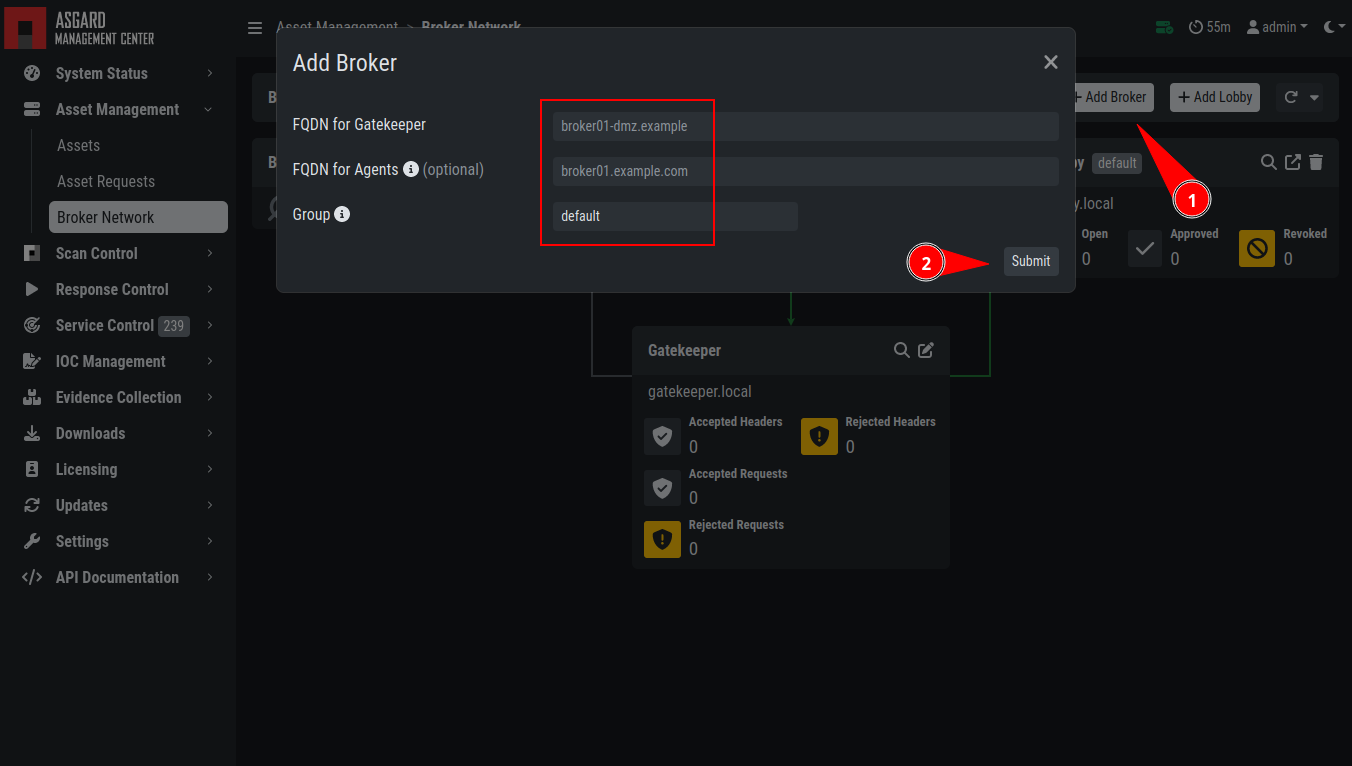
Navigate to Asset Management > Broker Network in your ASGARD Management Center.
On the top right corner, click Add Broker. Please fill in the FQDN
for Gatekeeper - this is the FQDN which your Gatekeeper will use to communicate
with this Broker. Additionally, if the Broker should be reached via
the open internet, you should assign FQDN for Agents as well (make
sure to set the A-Record in your public domain). If you leave the FQDN for Agents
empty, your agents will use the value of FQDN for Gatekeeper. You can leave the Group
as default, but should change it accordingly if you set a different group earlier for your Lobby.
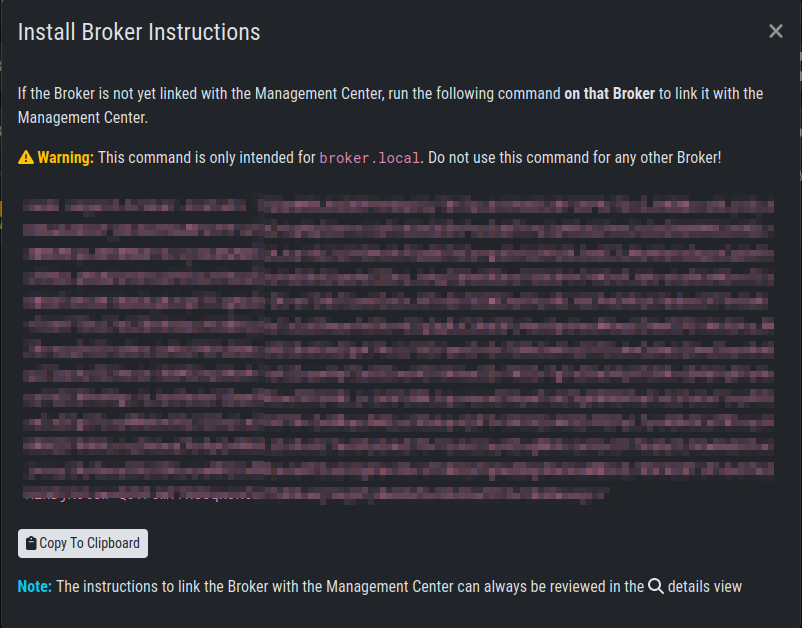
After you confirmed the settings for your new Broker, you will get another pop-up with a command
(sudo asgard2-gatekeeper-install '<TOKEN>'). Please copy this command and
execute it on the broker via SSH:

Once you are done, you can check the status and other settings of the Broker in your your ASGARD Management Center (magnifying glass icon):
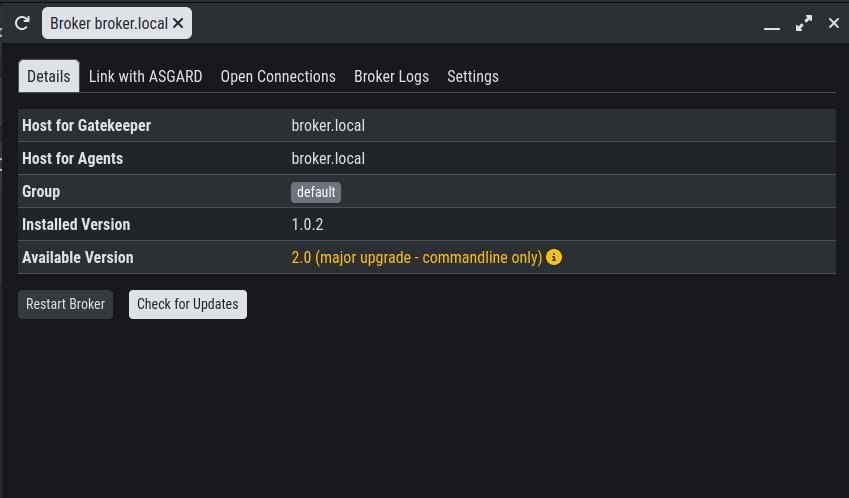
In this menu of your Broker, you can also configure NTP or rsyslog.
You might need to restart the Broker after the initial setup.
To see if the Broker is running correctly, you can run the following command (status should be active (running)):
nextron@broker:~$ systemctl status asgard-broker.service
● asgard-broker.service - ASGARD Broker
  Loaded: loaded (/lib/systemd/system/asgard-broker.service; enabled; vendor preset: enabled)
  Active: active (running) since Fri 2022-10-28 09:55:50 CEST; 6 days ago
Main PID: 10235 (bash)
   Tasks: 19 (limit: 4698)
  Memory: 1.4G
  CGroup: /system.slice/asgard-broker.service
          ├─10235 /bin/bash /etc/asgard-broker/run_asgard_broker.sh
          ├─10236 asgard-broker